
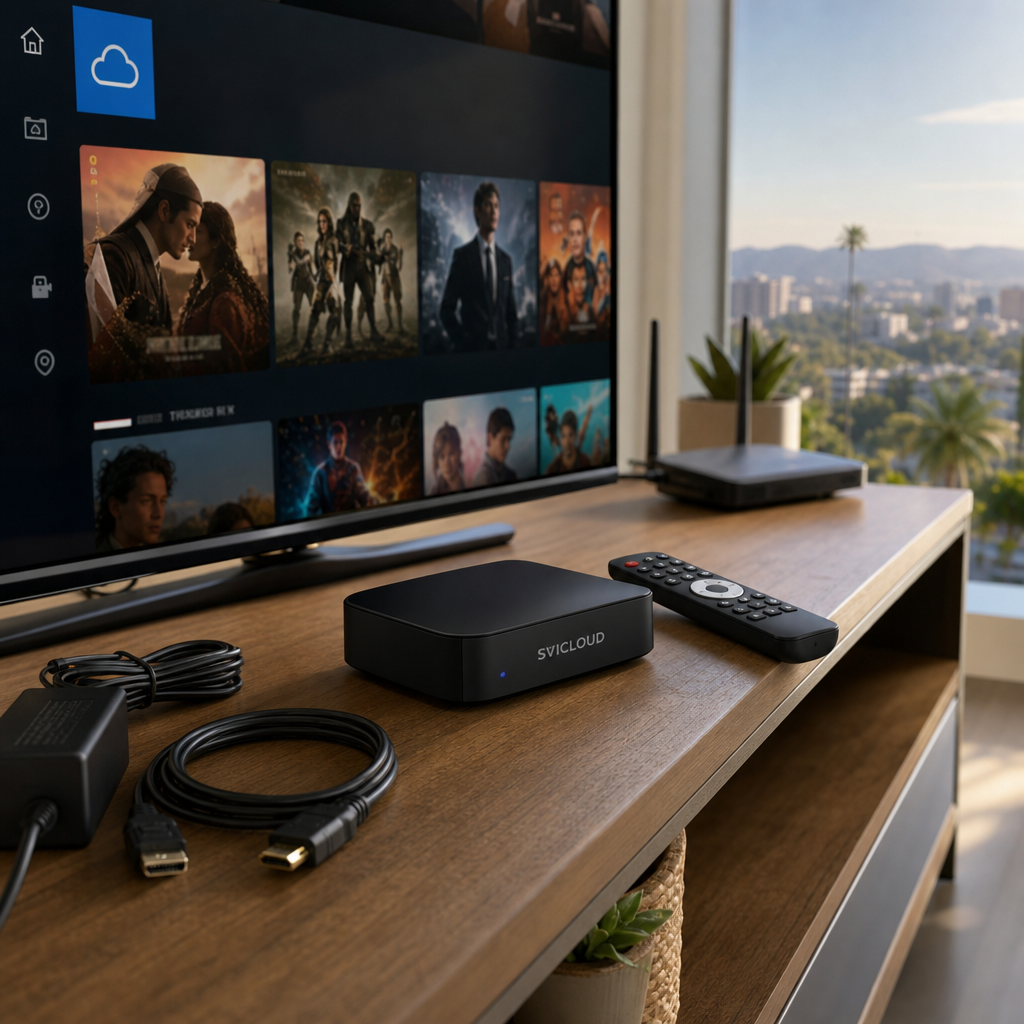
When people first get a SVICLOUD TV box, what often gets them stuck is not the features, but the most basic first steps: how to connect the cables, how to switch the display, how to connect to Wi‑Fi, and whether they need to log in first. Especially for beginners using a TV box for the first time, if even one part feels unfamiliar, the setup can seem complicated.
This article will guide you step by step through the SVICLOUD TV box first-time setup guide. From connecting cables, getting online, choosing a language, logging in, to finding Chinese content for the first time, we’ll explain things in a way that’s easy for beginners to follow so you can get to a smooth viewing experience faster; if you are in the United States, such as California, New York, or Texas, you can also refer more confidently to localized usage scenarios and support directions.
Get these things ready before you power on
Before setting up for the first time, preparing the necessary accessories and information in advance will make the process much smoother than searching for cables while entering passwords. For beginners, the more complete the preparation, the less likely you’ll have to start over repeatedly.
Basic accessories you need
Before you begin, make sure you have the following:
- SVICLOUD TV box unit
- Remote control
- Remote batteries
- Power cord and adapter
- HDMI cable
- A working TV or monitor
- Home Wi‑Fi network
- If you need to log in to an account, have your phone or email account ready
If you’re helping set it up for an older family member, it’s a good idea to write the Wi‑Fi password on paper or save it in your phone notes. That way, you won’t have to keep looking for the password while typing it in, which saves a lot of time.
Things to check in advance
Before powering on, quickly check a few important points:
- Whether the TV has an available HDMI port
- Whether that HDMI port is already being used by another device
- Whether the home Wi‑Fi is working properly
- Whether you know the Wi‑Fi password
- Whether you’ve decided to use Traditional Chinese or another familiar language
- If you plan to use Bluetooth headphones or speakers, whether the device has battery power
If you live in a large home in the United States, such as a typical detached house in Texas, the Wi‑Fi signal may weaken due to distance and walls; if you live in a New York apartment, you may face more interference from surrounding Wi‑Fi signals. These factors can affect stability during the initial setup, so checking them beforehand is important.
Know what you need to accomplish before the first setup
Many people feel there are too many steps, but when broken down, there are only a few things to do:
1. Connect the TV and power 2. Switch the display to the correct HDMI input 3. Choose the language and region 4. Connect to Wi‑Fi 5. Log in or create an account 6. Get familiar with the home screen 7. Find the Chinese content you want to watch first
If you want to understand the product positioning and usage concept first, you can also refer to the SVICLOUD U.S. official website and SVICLOUD plan comparison to look at the differences between SVICLOUD 10P+ and SVICLOUD 10S, then read this setup guide together for a clearer picture.
Step 1: Connect the cables correctly and power on
The most common first-time power-on problem is not the system setup, but that “the cables weren’t actually connected properly” or “the TV input source was selected incorrectly.” So don’t rush to use the remote yet—first confirm the cables and input source.
Connect the TV box to the TV
Please take out the HDMI cable and plug one end into the SVICLOUD TV box and the other end into an HDMI port on the TV.
When doing this, note the following:
- Plug the connector in all the way; don’t leave it loose
- Remember whether you plugged into HDMI 1, HDMI 2, or HDMI 3
- If the back of the TV is hard to see, use your phone’s flashlight
- If the TV already has a game console or another device connected, avoid plugging into the wrong port
If your TV is wall-mounted and there is less space at the back, it’s best to plug in slowly to avoid bending the HDMI connector. Small details like this seem simple, but many black-screen issues come from here.
Connect the power and check the indicator light
Next, connect the power cord to the unit and the wall outlet. After plugging it in, check whether the unit’s indicator light turns on; this usually helps confirm that the device has power.
When powering on for the first time, give it a little time:
- Some devices will first show a startup screen
- The first boot may take a few seconds longer than usual
- If the system is loading initial files, don’t keep unplugging and replugging the power
If there is no response at all after connecting the power, check the following first:
- Whether the outlet has power
- Whether the adapter is plugged in securely
- Whether the power cord is fully connected to the unit
- Whether the power strip switch is turned on
Switch the TV input source
After connecting the cables, use the TV’s own remote control to switch the input source, not the SVICLOUD TV box remote. This is one of the most common points of confusion for beginners.
Common button names may include:
- Input
- Source
- HDMI
- TV/Video
When switching, find the HDMI port you just plugged into. For example, if you plugged into HDMI 2, switch the input source to HDMI 2. Once the correct source is selected, you will usually see the startup screen or setup wizard.
If the screen does not appear, don’t rush to reset
If you get a black screen, check the following in order:
- Whether the TV is on
- Whether the TV is set to the correct HDMI input
- Whether the HDMI cable is firmly connected
- Whether the TV box’s indicator light is on
- Whether you accidentally plugged into the wrong port
Most first-time no-screen issues are caused by input source or cable connection problems, not necessarily a device malfunction. If you still don’t get a display after checking everything, you can organize the current situation and ask U.S. customer service and after-sales support for help, which will be more efficient.
Step 2: First boot screen and basic controls
Once you see the screen, you can officially begin the initial setup. The first time you enter, the system will usually guide you step by step, so there’s no need to panic.
Understanding the first boot screen
On the initial startup, you may see one of the following screens:
- Welcome screen
- Language selection page
- Region or time zone settings page
- Network connection page
- Account login prompt
- Terms of use or permission explanation
Depending on the batch or interface version, the order of the screens may vary slightly, which is normal. Just follow the on-screen prompts step by step; there’s no need to try to skip everything.
Remote control basics
If you don’t usually use a TV box, getting familiar with the remote will help a lot. The most commonly used buttons are usually these:
- Up, down, left, right: move the menu focus
- OK: confirm selection
- Back: return to the previous page
- Home: go to the home screen
- Volume buttons: adjust sound
- Settings button: enter system settings, if supported
During the initial setup, the most commonly used buttons are the directional keys, OK, and Back. When you’re unsure whether to select something, don’t keep pressing repeatedly—pause and read the on-screen instructions, which are usually enough to understand what to do.
What to do if the remote does not respond
If you press the remote and the system doesn’t respond, don’t rush to assume there is a problem with the unit. Check the following in order:
- Whether the batteries are inserted the wrong way
- Whether the batteries are dead
- Whether you forgot to remove the plastic insulating tab
- Whether you are pointing toward the unit’s receiver
- Whether pairing is required
- Whether the unit is frozen and needs a restart
In some cases, first-time use may require simple pairing or just moving closer to the unit before trying again. If you’ve replaced the batteries and restarted the unit but still can’t control it, note the screen status and the remote’s behavior, then contact U.S. customer service and after-sales support.
Helpful tips for beginners
To make the first setup smoother, keep these tips in mind:
- Don’t press buttons too many times in a row, or you may skip options
- After completing each step, check whether it was applied successfully
- If you choose the wrong option, the Back button usually returns you to the previous page
- If you can’t understand English, prioritize switching the language to Traditional Chinese, which you’re familiar with
Doing this lets you complete the process slowly using the on-screen prompts, even if you’ve never used a TV box before, without needing a high technical skill level.
Step 3: Set the language and region
For most Chinese-language users, one of the most important first setup steps is switching the interface to a language you can understand. This directly affects the efficiency of later steps like connecting to the internet, logging in, and finding content.
Choose a language you are familiar with
If you usually read Traditional Chinese, it’s recommended to switch to Traditional Chinese right away. That way, the settings names, button locations, and instructions will be more intuitive.
When choosing a language, consider:
- The reading language you are most familiar with
- Whether you are setting it up for an older family member
- Which language is most convenient for shared use in the household
- Which language you’ll use most when searching for content in the future
If you’re in a Chinese-speaking household in California, New York, or Texas, there may be both Chinese and English users at home. In that case, set the language based on the main person who will be using it first, and adjust later if needed.
Set the region and time zone
After the language is set, you will usually see the region or time zone setting next. This step may not seem important, but it affects many usage details.
Setting the correct region and time zone helps with:
- Displaying the system time correctly
- Making some login verification processes smoother
- Making schedules, records, or recommended content more relevant to your actual location
- Avoiding issues caused by time mismatch
If you are in the United States, pay special attention to whether the time zone is correct. For example:
| Example region | Common time zone direction |
|---|---|
| California | U.S. West Coast time zone |
| Texas | May correspond to Central time depending on the location |
| New York | U.S. East Coast time zone |
There’s no need to memorize time zone names. The key is to confirm whether the local time shown by the system looks reasonable. If the time is far off, some functions may later become inconvenient.
Common setup mistakes to watch for
Common mistakes in language and region settings include:
- Choosing an unfamiliar language and not understanding the rest
- Setting the wrong time zone, causing incorrect system time
- Accidentally switching the region to another location, leading to content recommendations that don’t match your habits
- Skipping too quickly and failing to save some settings
If you choose the wrong option by mistake, you can usually go back into the settings menu and adjust it again. If you can’t find the right place, you can return to the home screen and then enter system settings from the settings icon to make corrections.
When should you double-check
After finishing the language and region settings, it’s a good idea to confirm them once more, especially if:
- The interface still looks like English
- The time on the home screen is obviously wrong
- Some button labels look inconsistent
- You encounter a time-related error during login verification
If you’re worried that different models may have slightly different interfaces, you can first check the SVICLOUD FAQ for similar setup instructions.
Step 4: Connect to Wi‑Fi
After completing the basic language and region settings, the next step is usually to connect to the internet. This step is very important because most later functions, login processes, and content loading require a stable network connection.
Choose your Wi‑Fi
After entering the network settings, the system will usually list the nearby available Wi‑Fi names. Find your home network name, select it, and enter the password.
The process usually looks like this:
1. Enter network or Wi‑Fi settings 2. Turn on Wi‑Fi 3. Select your home network name from the list 4. Enter the password 5. Confirm and wait for the connection
If your home has separate 2.4G and 5G Wi‑Fi names, you can usually start by choosing the one with the more stable signal and closer distance. If you’re not sure which is better, connect first and adjust later based on use.
Tips for entering the password
For many beginners, the issue with Wi‑Fi is not that it won’t connect, but that the password was entered incorrectly. The input method on a TV screen is not as intuitive as on a phone, so pay close attention to the following:
- Whether uppercase and lowercase letters are correct
- Whether number 0 and letter O are confused
- Whether lowercase l, uppercase I, and number 1 are mixed up
- Whether any symbols are missing
- Whether there are accidental spaces before or after the password
If the password is long, it’s recommended that you:
- Open the password on your phone for reference
- Enter it slowly, one character at a time
- Check it again after typing
- Avoid repeatedly retrying in a rush
Some users connect a keyboard for typing, which is indeed more convenient for long passwords, but it is not necessary. For the first setup, just be patient and type carefully, and you’ll still be able to complete it.
What to do if Wi‑Fi won’t connect
If you selected the network and entered the password but still cannot connect, check the following in order:
- Whether the password is correct
- Whether the router is working properly
- Whether the TV box is too far from the router
- Whether walls or furniture are blocking the signal
- Whether your phone can also connect to the same Wi‑Fi
- Whether a previous incorrect setup needs to be re-entered
Try these simple actions first:
- Turn Wi‑Fi off and back on
- Forget the network and reconnect
- Restart the TV box
- Restart the router
- Move the TV box closer to the router to test
If you live in a larger home in California or Texas, weak Wi‑Fi signal caused by distance from the living room to the router is common; if you live in a New York apartment, interference in a dense wireless environment can also happen. These issues are not necessarily caused by the device itself, but by the local network conditions.
Wired internet is a more stable alternative
If stability matters to you, or if you often watch for long periods, stream live content, or play high-definition videos, you may want to use a network cable connection.
Common advantages of wired internet:
- Usually more stable
- Less affected by distance and interference
- Better for long viewing sessions
- Reduces Wi‑Fi dropouts or fluctuating speeds
If your router is near the TV cabinet, wired connection is often a very practical choice. However, if your home layout makes cabling inconvenient, Wi‑Fi can still work; it’s just best to keep the signal quality strong.
How to tell if you are successfully online
After connecting to the network, look for these signs:
- The system shows connected
- Home screen content begins loading
- Time synchronization is normal
- You can enter the login page or content page smoothly
If the screen keeps loading, it doesn’t necessarily mean there is no internet; it may also mean the signal is unstable. In that case, don’t rush to the next step—stabilize the network first so the rest of the setup will go more smoothly.
Step 5: Log in or create an account
After the network connection is complete, many systems will prompt you to log in. For beginners, this step often raises a question: do I have to log in? Can I skip it for now?
In practice, whether you need to log in right away depends on the current system flow and feature requirements; but if the system clearly prompts you, it is usually recommended to follow the steps, which will make later use more convenient.
Why log in to an account
Common uses for account login include:
- Syncing personal preferences
- Saving some settings
- Making device management easier later
- Avoiding repeated setup after a reset
- Allowing certain services or features to work properly
For regular home users, the value of an account is not that you absolutely must have one, but that it makes future setting changes, data recovery, or re-login easier.
Common login methods
Depending on actual system support, common login methods may include:
- Email login
- Mobile verification
- Verification code login
- Other third-party login methods
Since interfaces may differ slightly between versions, the text on the screen may not be exactly the same. In such cases, prioritize the buttons or descriptions such as “Log in,” “Create account,” “Sign up,” or “Skip for now” before deciding what to do.
What beginners should watch for when logging in
The most common mistakes during first-time login are usually not with the account itself, but with details. Please pay special attention to:
- Whether the email address is typed correctly
- Whether the verification code has expired
- Whether the password case is correct
- Whether you accidentally used the wrong email account
- Whether the permission requested by the system is a normal prompt
If you are setting it up for a family member, it’s recommended to use an email address they can usually access and remember easily. That way, if they forget the password later, they can handle it more easily themselves.
What to do if you forget your password
If you forget your password, don’t keep trying repeatedly. Usually you can:
1. Click Forgot password 2. Follow the system prompts to enter your email or phone number 3. Receive a verification code or reset link 4. Set a new password 5. Return to the login page and sign in again
If the screen shows an error you don’t understand, it’s a good idea to take a photo or record the message, then ask U.S. customer service and after-sales support for help. That makes it easier for support to determine where you got stuck.
When you can skip login temporarily
In some cases, the system may allow you to skip login and complete it later. This is usually suitable when:
- You only want to confirm the device can power on normally
- A family email account cannot receive messages right now
- You want to get familiar with the home screen and controls first
- You want to confirm the network is stable before completing setup
However, if you want to finish the setup in one go, it’s still recommended to complete the login during the first startup so you won’t have to deal with it later.
Step 6: Finish the basic system settings to make viewing easier
Once language, time zone, network, and account are done, don’t rush straight into finding content. Spend a few minutes on some basic adjustments to make first-time use smoother, especially if you plan to watch for a long time.
First, check the display resolution and visual quality
If the picture looks blurry or the proportions seem strange, it may be related to display settings. In that case, go to the system display or screen settings to confirm.
You can check the following:
- Whether the image fills the screen
- Whether the text is clear
- Whether the icons are not cropped
- Whether the colors and brightness look normal
If your home uses a newer large TV, such as many 4K TVs commonly seen in California or Texas living rooms, it’s even more important to confirm that the display is using an appropriate resolution. If you’re not sure what to choose, automatic detection is usually a safer starting point.
Adjust volume and audio output
After you get the first picture on screen, don’t forget to test the sound. Some people think there is no sound because of a device problem, when in fact the TV is muted, the volume is too low, or the audio output hasn’t been matched correctly.
Recommended checks:
- Whether the TV is muted
- Whether the TV box volume is too low
- Whether an external speaker or soundbar is connected
- If you use Bluetooth headphones, whether pairing was successful
If you plan to use it at night in a New York apartment, Bluetooth headphones are a very practical option; if you want a more immersive movie experience in a Texas or California living room, external speakers or a soundbar may be more suitable.
Be patient with system updates
Some devices may prompt for an update after connecting to the internet for the first time. If the system offers an official update option, it is usually worth completing it when the network is stable, so you can get the latest interface or fixes.
When updating, keep the following in mind:
- Make sure the network is stable
- Do not unplug the power midway
- Do not keep pressing buttons repeatedly
- Wait for the system to finish before continuing
If the network is unstable at that moment, you can postpone it and update later when the network environment is more stable. The key is not to forcefully interrupt the process when you are unsure.
A few very practical basic settings
After the initial process is finished, you can quickly check these common settings:
- Whether the interface language is correct
- Whether the time is displayed normally
- Whether the network shows connected
- Whether the home screen content loads properly
- Whether the remote control works smoothly
- Whether you need to connect Bluetooth devices
These may seem simple, but if all of them work properly, it usually means the first-time setup has entered a stable stage.
Step 7: How to find Chinese content for the first time
After setup, many people’s biggest question is: “Where do I find Chinese content?” In fact, this step is not necessarily difficult—the key is to get familiar with the home screen and search method first.
Start by understanding the home screen categories
When many beginners see the home screen, they feel a little lost because there are so many items. It’s best not to open too many menus at once. Instead, first look closely at the common areas on the home screen.
A typical home screen may include:
- Recommended content
- Category section
- Search entry
- Recently used
- Settings menu
First understand where “Search” is, how to press “Back,” and how to return to the home screen. After that, finding content will be much faster.
Search is the fastest starting point
If you already know what you want to watch, search is usually the most direct method. You can begin with simple, common Chinese keywords such as:
- Drama title
- Variety show title
- Movie title
- Actor name
- Program type, such as “period drama,” “family drama,” or “animation”
When beginners search for the first time, it’s best to use short keywords. Typing on a TV screen is usually slower than on a phone, so shorter keywords are easier to enter successfully.
Browsing by category is also great for beginners
If you’re not sure what to watch yet, start from categories. This is especially friendly for older family members because it doesn’t require typing first.
You can begin with categories like:
- Chinese dramas
- Variety shows
- Movies
- Anime
- Kids’ content
- News or other informational content
The benefit of this method is that even if you don’t have a clear target, you can still get familiar with the overall content layout. Over time, you’ll naturally learn which section you visit most often.
Build your own first batch of frequently used habits
Once you find something you want to watch for the first time, it’s worth building a few usage habits right away, which will make things easier later:
- Remember the location of commonly used entries
- First look through the content types you watch often
- Observe whether similar recommendations appear on the home screen
- Note the category names your family members watch most often
If you’re setting it up for family, this step is especially important. Rather than explaining too many features at once, it’s more practical to teach them directly:
- Which button to press after powering on
- How to return to the home screen
- How to go back one page
- Where the content they usually watch is located
That is more useful than introducing too many functions.
Common small issues when finding Chinese content
Common first-time content-finding problems include:
- Not knowing where the search entry is
- Typing keywords that are too long
- Too many menus and not knowing what to click
- Feeling panicked when the interface is in English
- Accidentally pressing Back and returning to the previous page
When these happen, return to the home screen and start again from search or categories. That is usually more efficient than wandering through complicated pages.
Step 8: Summary of the most common first-time setup issues
Even if you follow the steps, beginners may still run into a few small issues during the first setup. The table below organizes the most common problems for quick reference.
Quick troubleshooting table
| Problem | Possible cause | Suggested fix |
|---|---|---|
| No picture on the TV | HDMI plugged into wrong port, wrong input source selected, cable not secure | Confirm the HDMI port and switch to the correct input source |
| Unit does not respond | Power not connected properly, outlet has no power | Check the adapter, outlet, and indicator light |
| Remote does not work | Batteries inserted wrong, dead batteries, not paired | Reinsert batteries, restart, confirm whether pairing is needed |
| Cannot connect to Wi‑Fi | Incorrect password, weak signal, router issue | Re-enter the password, move closer to the router, restart devices |
| Interface is hard to understand | Wrong language selected | Go into settings and switch back to a familiar language |
| Time is incorrect | Wrong time zone setting | Recheck the region and time zone |
| Login failed | Email typed incorrectly, wrong password, verification code expired | Try logging in again or use Forgot password |
| Content loads slowly | Unstable network or weak signal | Improve Wi‑Fi quality or consider a wired connection if needed |
Most of these issues are common during first-time setup and do not necessarily mean there is a hardware problem. Check them in order, and they often can be solved.
When to seek help
If you’ve already tried basic troubleshooting and are still stuck, it’s best to contact support. This is especially true in the following situations:
- You’ve checked the cables multiple times and still have no picture at all
- The remote still cannot control the unit
- The network is normal but the system still cannot complete setup
- The login process keeps failing for no clear reason
- You’re worried you may be operating it incorrectly and don’t want to keep resetting it
For beginners, describing the problem clearly early on is more effective than trying random fixes. You can prepare the following information before asking for help:
- Which step you are stuck on
- What the screen is showing
- Whether you have already restarted the device
- Whether you replugged the HDMI cable or reconnected the network
- Which region and network environment you are using
If you are in the United States and want more direct setup or after-sales help in Chinese, you can refer to U.S. customer service and after-sales support.
How beginners can view the differences between SVICLOUD 10P+ and SVICLOUD 10S
For beginners who are still choosing a model, or who just received the device and are not sure which version they have, it helps to understand the model differences first. However, the core process for first-time setup is usually very similar: connect the cables, get online, log in, and find content.
What beginners can look at first when choosing
You can judge which one suits you better from the following aspects:
- Who mainly uses it at home
- Whether you want the operation to be as simple as possible
- Whether you care about different feature configurations
- Whether you want to compare after-sales support and overall differences first
If you want to learn more about the features, positioning, and differences between SVICLOUD 10P+ and SVICLOUD 10S, the easiest way is to go directly to the SVICLOUD plan comparison. That is more time-efficient than searching for information in a scattered way, and it makes the differences easier to grasp.
No matter which one you have, the first setup focus is the same
Although different models may differ in features, the key things beginners need to do during the first setup are the same:
- Connect the cables correctly
- Select the correct input source
- Switch the language to one you know
- Keep the network stable
- Prepare account information
- Learn how to return to the home screen and use search
As long as these basic steps are handled well, you’ll usually get up to speed much faster afterward.
What to do after the first setup is complete
Once you complete the first-time setup, congratulations—the part most likely to make beginners nervous is already over. What comes next is slowly building your usage habits so every power-on feels easier.
You can start with these tasks:
- Test whether the content you watch often opens properly
- Teach your family how to return to the home screen and search
- Confirm that the network and time settings are normal
- Save your common login information safely
- If needed, note your current setup status for future adjustments
If you are still comparing SVICLOUD 10P+ and SVICLOUD 10S, you can first look at the SVICLOUD plan comparison. To check the latest official information and U.S.-specific content, visit the SVICLOUD U.S. official website. If you run into issues during setup, it’s recommended to refer directly to the SVICLOUD FAQ; if you need further Chinese support, you can also contact U.S. customer service and after-sales support.