
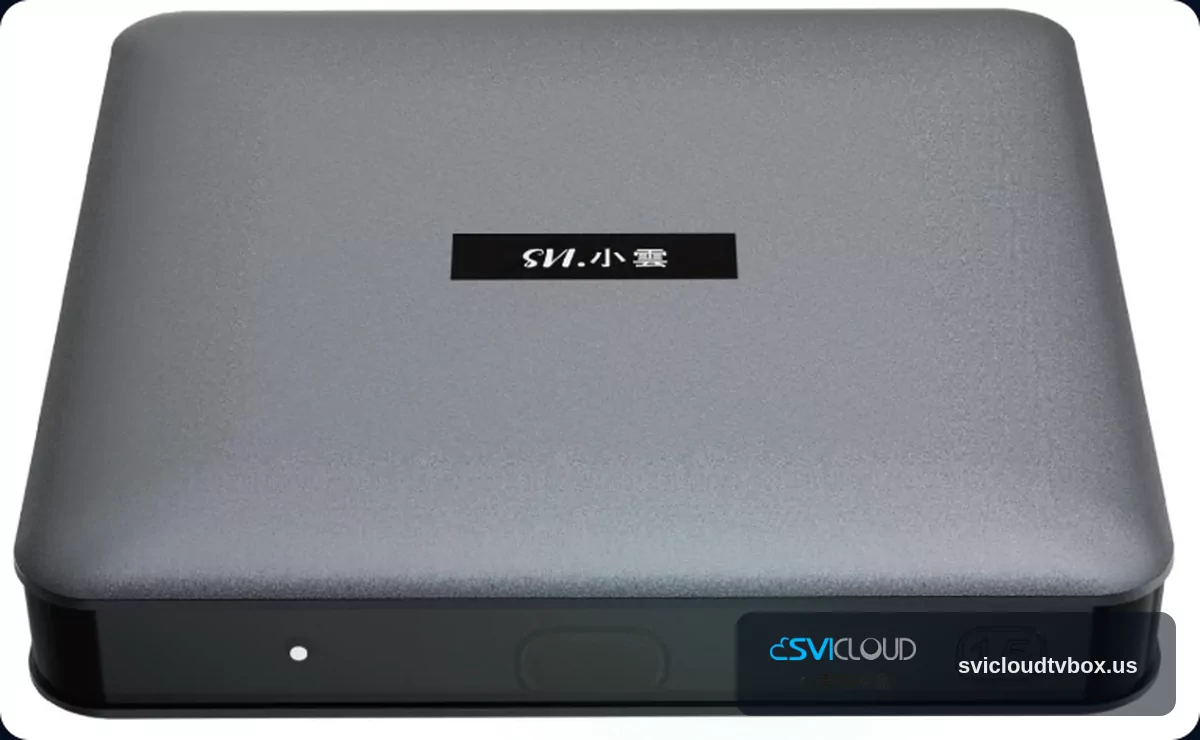
SVICLOUD 15P First Boot and Android 14 Setup Guide
After getting the SVICLOUD 15P, many people’s first question is not about how many functions it has, but: how do you connect it for the first time, power it on, and finish the basic setup?
This article is organized as a beginner-friendly first-boot guide based on the confirmed specifications of the SVICLOUD 15P, including Android 14, Wi‑Fi 6, Bluetooth 5.4, HDMI 2.1, and RJ45.
This guide focuses on installation and initial setup only. It does not speculate about unconfirmed features, and it does not discuss prices, promotions, or stock status. If you want to check the official product information first, please refer to:
---
Prepare these items before you start
Before the first installation, spend 1 minute checking the accessories and environment. It will make the rest much smoother.
Basic items you need
- SVICLOUD 15P main unit
- Remote control
- Power accessories
- HDMI cable
- TV or monitor
- Available network connection
- If you want a wired connection, also prepare an RJ45 network cable
Small things that are easy to overlook
When first setup gets stuck, the most common reasons are usually not a device problem, but:
- HDMI cable not inserted firmly
- TV input source set incorrectly
- Network not connected yet
- Remote batteries not installed
- Remote has not been paired yet
Checking these basics first can save a lot of troubleshooting time.
---
First, understand the confirmed specs related to setup
Below are the confirmed specifications of the SVICLOUD 15P used in this article:
| Item | Confirmed specification |
|---|---|
| Operating system | Android 14 |
| Processor | Amlogic S905Y5 quad-core ARM Cortex-A55 |
| Memory | 4 GB DDR3 RAM |
| Storage | 64 GB eMMC storage |
| Wireless networking | dual-band Wi‑Fi 6 |
| Bluetooth | Bluetooth 5.4 |
| Video output | HDMI 2.1 |
| Wired networking | RJ45 wired Ethernet |
| Remote control | Bluetooth voice remote |
| Media capability | 4K HDR, AV1 hardware decoding |
The most useful points for first-time setup
You do not need to memorize all the specs, but these are worth remembering:
- Android 14: the first boot will go into the Android initial setup flow
- Wi‑Fi 6 / RJ45: choose wireless or wired networking depending on your home environment
- Bluetooth 5.4: used for remote pairing and Bluetooth device pairing
- HDMI 2.1: connect the box to your TV with an HDMI cable
- 4K HDR / AV1: these are media specifications, but you still need to complete the network and basic setup first
---
Step 1: Complete the connections
It is recommended to connect all cables before powering on. This makes the on-screen process more consistent and reduces the chance of looking for cables while setting up.
1. Place the device in a suitable location
When placing the unit, pay attention to the following:
- Put it on a stable surface
- Keep it ventilated
- Do not enclose it completely inside a cabinet
- Keep it as close to the TV as practical
- If using Wi‑Fi, avoid heavy blocking from thick walls or large metal objects
2. Connect the HDMI cable
The SVICLOUD 15P is confirmed to support HDMI 2.1. The connection is simple:
1. Connect one end of the HDMI cable to the SVICLOUD 15P 2. Connect the other end to the TV’s HDMI port 3. Note which input source you used, such as HDMI 1 or HDMI 2
If there is no picture later, first check whether the TV input source is set to the correct HDMI port.
3. Connect RJ45 if you want a wired network
If you prefer a more stable wired connection, connect the network cable first.
1. Connect one end of the network cable to the router 2. Connect the other end to the RJ45 port on the SVICLOUD 15P
If you do not connect it yet, that is fine. You can also finish setup using Wi‑Fi 6.
4. Finally, connect the power
Recommended order:
1. Connect HDMI first 2. If using wired networking, connect RJ45 first 3. Then connect the power 4. Turn on the TV 5. Switch the TV to the correct HDMI input source
Quick checklist before powering on
- HDMI is connected
- Power is connected
- RJ45 is connected if using wired networking
- TV is switched to the correct input source
- Remote control is ready
---
Step 2: Prepare the remote control
The SVICLOUD 15P comes with a Bluetooth voice remote. On first use, it is common to follow the on-screen prompts to complete pairing.
Check these before use
- Whether the batteries are installed
- Whether the battery polarity is correct
- Whether the remote responds at all
- Whether you are operating it near the main unit
Know these buttons first
During initial setup, the most commonly used buttons are:
- Directional buttons: move up, down, left, and right
- Confirm button: select an item
- Back button: return to the previous page
- Home button: return to the home screen
- Voice button: use it according to the on-screen instructions if prompted
If a remote pairing prompt appears on the screen, follow the current on-screen instructions rather than guessing the button combination.
---
Step 3: First power-on and Android 14 initial setup
Once the cables and remote are ready, you can power on the device.
What you will usually see after powering on
Since the SVICLOUD 15P is confirmed to run Android 14, the first boot usually shows the following in order:
- Boot loading screen
- Welcome or initial setup screen
- Language selection
- Network connection
- Account sign-in or skip
- Basic preference settings
- Home screen
The exact screens may vary slightly depending on the system version, but the process is usually similar.
---
Step 4: Choose language, region, and time
After entering the initial setup, you will usually start with basic system information.
Items to confirm first
- System language
- Region
- Time zone
- Date and time format
If you are using the device in the United States, pay special attention to whether the time zone is correct. If the system offers an option such as “automatic time from network,” it is usually fine to keep the default and check it again after connecting to the internet.
---
Step 5: Connect to the network
The SVICLOUD 15P supports Wi‑Fi 6 and RJ45 wired networking, so you can choose the one that best fits your home environment during first setup.
Option 1: Use Wi‑Fi
1. Select your home Wi‑Fi name from the network list 2. Enter the password 3. Choose connect 4. Wait for the system to show that it is connected
If your home has separate 2.4GHz and 5GHz network names, choose the one you normally use and that is more stable.
Option 2: Use RJ45 wired networking
1. Make sure the network cable is connected to both the device and the router 2. Open the network settings page 3. Check whether wired networking is shown as connected
In many cases, once the cable is plugged in, the system will detect it automatically and no extra information needs to be entered.
How to choose between Wi‑Fi and wired
A simple guide:
| Connection type | Best for |
|---|---|
| Wi‑Fi 6 | When running a cable is inconvenient or you need flexible placement |
| RJ45 wired network | When the router is nearby and stability is the priority |
If your home Wi‑Fi has a lot of interference, you can later test RJ45 instead.
---
Step 6: Google account sign-in and basic preferences
During the Android 14 initial setup, you may see an account sign-in step.
Should you sign in now?
You can decide based on how you use the device:
- If you want to finish the setup process first, you can skip it for now
- If you already have your account ready, you can sign in directly
For beginners, it is usually most important to make sure these three things work first:
- The device powers on normally
- The device connects to the network normally
- The remote control works normally
You can add other settings later after entering the home screen.
Other basic preferences
You may also see:
- Terms of service
- Privacy options
- Device name
- Date and time
- General system preferences
If you see advanced options that you do not understand, keeping the default values is usually the safest choice.
---
Step 7: After entering the home screen, check these items first
Once the initial setup is complete, do not rush to jump around too many pages. First confirm a few basic items.
1. Find the settings entry
Get familiar with:
- Settings menu
- Network settings
- Bluetooth settings
- Device information
- How to return to the home screen
2. Check the network status again
You can quickly confirm with the following:
- The settings page shows connected
- The system time is displayed correctly
- The home screen loads normally
- Internet-dependent functions can be opened
3. Check the date, time, and time zone
If you skipped this earlier, you can check again now:
- Whether the date is correct
- Whether the time is correct
- Whether the time zone is correct
4. Check Bluetooth and remote status
Since the SVICLOUD 15P supports Bluetooth 5.4, you can go to the Bluetooth settings page and check:
- Whether Bluetooth is turned on
- Whether the remote has paired successfully
- Whether the operation is normal
---
Step 8: Key points for Bluetooth voice remote setup
When using the Bluetooth remote for the first time, you do not need to learn every feature at once, but you should at least understand the basic operation logic.
Things to note during pairing
- Operate near the main unit
- Follow the on-screen prompt and press the specified button
- Do not repeatedly press other buttons during pairing
- If pairing fails, follow the prompt again and try once more
How to understand the voice function
The SVICLOUD 15P comes with a Bluetooth voice remote. Whether any additional authorization is required and whether it is available immediately depends on the system prompts.
For beginners, the most practical order is:
1. Learn the directional and confirm buttons first 2. Then get familiar with the back and home buttons 3. Finally, try the voice function if needed
---
Common problems and how to troubleshoot them
If the first boot gets stuck, most issues can be solved with basic troubleshooting.
Problem 1: No picture on the TV
Check the following in order:
1. Is the TV powered on? 2. Is the main unit connected to power? 3. Is the HDMI cable firmly connected? 4. Is the TV input source set to the correct HDMI port? 5. If necessary, unplug and reconnect the HDMI cable
Problem 2: Wi‑Fi cannot be found or connected
First check:
- Whether the router is working properly
- Whether the distance between the device and router is too far
- Whether the Wi‑Fi password is correct
- Whether the home network is temporarily unstable
You can try:
- Searching for Wi‑Fi again
- Re-entering the password
- Restarting the router
- Temporarily using RJ45 to finish the initial setup
Problem 3: The remote does not respond
First confirm:
- Whether the batteries have power
- Whether the battery direction is correct
- Whether Bluetooth pairing is complete
- Whether the main unit has fully powered on
- Whether you are on a screen where input is possible
If the screen shows pairing instructions, repeating the process according to the prompt is usually the most direct solution.
Problem 4: The setup steps are confusing
Recommended approach:
- Finish the required items first
- Keep advanced settings at their default if you are unsure
- Skip non-essential sign-ins for now
- Return to adjust settings after reaching the home screen
---
Why the first setup matters
First setup is not just about turning the device on. For a device like the SVICLOUD 15P, which includes Android 14, Wi‑Fi 6, Bluetooth 5.4, HDMI 2.1, and RJ45, the basic setup directly affects how convenient it is to use later.
The three most important things to get right first
1. A stable network connection 2. Smooth remote control operation 3. Correct time, region, and basic system settings
Network connection is especially important because it usually has the biggest impact on daily use. If your Wi‑Fi environment is complicated, you can later compare whether Wi‑Fi or RJ45 works better for your home.
---
Beginner installation suggestion: follow this order to stay organized
If you just received the SVICLOUD 15P, you can follow this process to complete the first setup:
1. Confirm that the main unit, remote control, power cable, and HDMI cable are all present 2. Connect the HDMI cable 3. If needed, connect RJ45 first 4. Prepare the remote batteries 5. Connect the power and turn it on 6. Follow the Android 14 screens to complete language, network, and basic settings 7. After entering the home screen, check the network, Bluetooth, time, and system information
---
One-page quick checklist
If you only want a fast confirmation that setup is complete, use this checklist:
- [ ] HDMI is correctly connected to the TV
- [ ] The TV is set to the correct input source
- [ ] Power is connected and the device boots normally
- [ ] Wi‑Fi or RJ45 is connected successfully
- [ ] The remote can move and confirm normally
- [ ] System language, region, and time zone are set correctly
- [ ] You have entered the home screen
- [ ] You can open Settings to view network and Bluetooth status
---
Official information and support
If you want to check the official product information, please refer to the product page:
If you need further help with initial setup, remote pairing, or basic operation, you can contact official support through the following:
- Phone: 702-398-3416
- Email: [email protected]
---
Conclusion
The first boot process for the SVICLOUD 15P really comes down to three things: correct wiring, network connection, and completing the basic setup on the Android 14 screens.
As long as you handle the HDMI, power, Wi‑Fi or RJ45, and remote pairing steps properly, the rest of the experience will usually go much more smoothly.
If you want to check the official specifications or product information first, please visit: